
Have you ever dreamt of a lush, vibrant garden that thrives without constant manual watering? Imagine a space where flowers bloom, lawns flourish, and the hassle of dragging hoses around is a thing of the past. A well-designed and properly installed sprinkler system is the key to achieving this dream. Here, we unveil a comprehensive step-by-step guide that demystifies the process of sprinkler installation, empowering you to bring your garden to life effortlessly.
Your Ultimate Sprinkler System Installation Guide
Step 1: Planning for Success
Before plunging into the world of sprinkler systems, it’s essential to lay a solid foundation through thoughtful planning. Assess your garden’s layout, considering the type of plants, their water needs, and the area’s layout. Map out zones to ensure comprehensive coverage while factoring in any obstacles like trees, pathways, or structures. Understanding your garden’s unique characteristics is pivotal in determining the system that best suits your needs.
Step 2: Gathering the Tools and Supplies
Equipped with a well-thought-out plan, the next step is to gather the necessary tools and supplies. Apart from the sprinkler system components such as pipes, valves, and sprinkler heads, you’ll need a trenching tool, a PVC cutter, pipe glue, Teflon tape, and various fittings. Investing in a timer or controller for automated watering is also wise, ensuring a consistent and efficient schedule.
Step 3: Designing the System
Designing the sprinkler system involves translating your garden layout into a blueprint for the installation. This process includes deciding on the type of sprinklers best suited for each zone, calculating water pressure, and understanding the necessary pipe sizes for optimal water distribution. Efficiently designing the system ensures uniform water coverage and minimizes water waste.
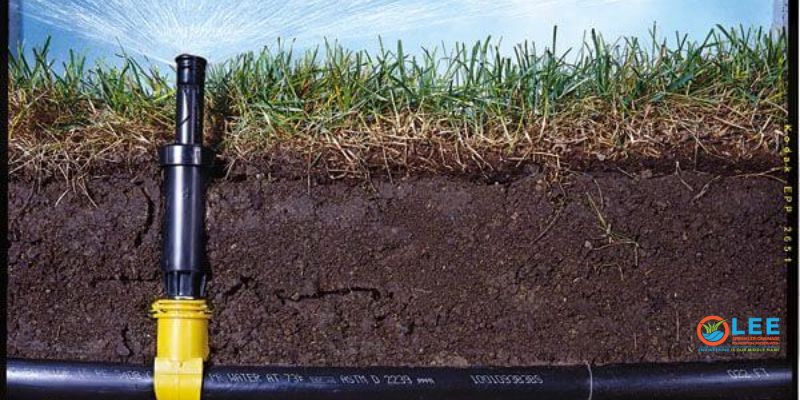
Step 4: Digging and Laying the Pipes
With a plan and materials ready, it’s time to start digging trenches for the pipes. The depth of the trenches should accommodate the pipes and be deep enough to avoid interference from foot traffic or other activities in the garden. Precision is crucial as you lay the pipes and connect them according to the design, ensuring they align with the zone divisions.
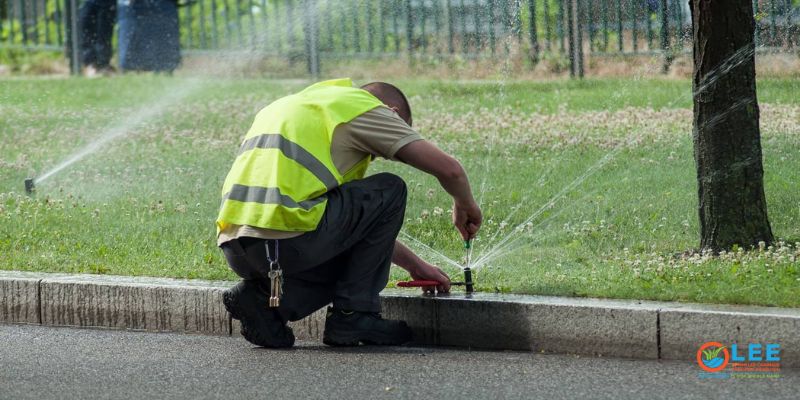
Step 5: Installing the Control Valves and Sprinkler Heads
The heart of any sprinkler system lies in the control valves and sprinkler heads. Carefully install these components according to the design plan, connecting the control valves to the main water supply. As you install the sprinkler heads, test their positioning to ensure optimal coverage and adjust as necessary.
Step 6: Assembling and Testing the System
Once the physical installation is complete, it’s time to assemble the different parts of the system. Double-check all connections, ensuring they are secure and leak-free. Following this, turn on the water supply to the system and test each zone, observing the sprinklers’ performance and coverage. This step is crucial in detecting and rectifying issues before the final implementation.
Step 7: Programming the Controller
Modern sprinkler systems often come with programmable controllers, allowing for precise scheduling and conservation of water. Program the controller according to the specific needs of your garden, accounting for factors such as plant type, weather conditions, and seasonal changes. A well-configured controller ensures that your garden receives just the right amount of water at the right time, promoting healthy growth while conserving resources.
Step 8: Maintenance and Regular Checks
The installation might be complete, but the journey toward a flourishing garden continues with regular maintenance. Inspect the system periodically, checking for leaks, adjusting sprinkler heads, and ensuring the timer or controller functions optimally. Additionally, winterization of the system in colder climates is crucial to prevent damage from freezing temperatures.
Essential Sprinkler System Maintenance Tips
A well-installed sprinkler system can be a garden’s best friend, transforming the hassle of manual watering into an automated, efficient process. However, regular maintenance is paramount to ensure the system continues to function optimally and keeps your garden thriving. Here are some crucial tips to preserve the vitality of your sprinkler system:
Regular Inspections
Frequent checks are the backbone of proper sprinkler system maintenance. Inspect the system for leaks, clogs, or damaged components. Look for puddles or overly dry areas, which could signal issues with water distribution. Addressing these problems promptly ensures efficient water usage and prevents potential damage to the landscape.
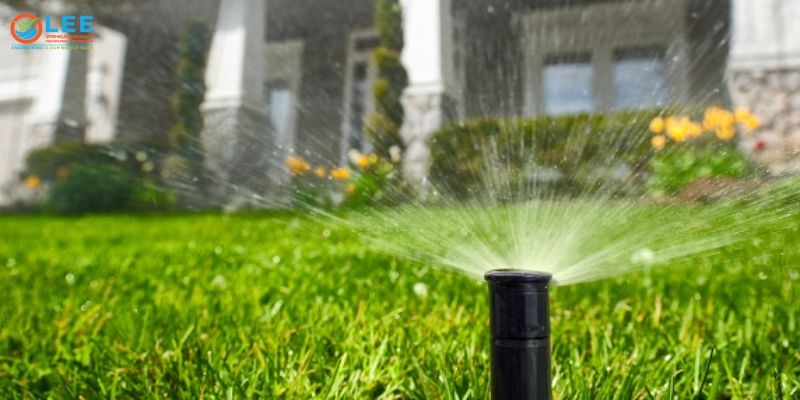
Adjust Sprinkler Heads
Your garden is a dynamic space; plants grow and change over time. Adjust the direction and range of your sprinkler heads to accommodate this growth. Ensure they cover the intended areas and don’t water sidewalks, driveways, or other non-plant areas. Properly adjusted heads not only maintain the health of your garden but also prevent water waste.
Cleaning and Clearing
Regularly clean and clear the sprinkler heads and filters. Debris can accumulate, leading to blockages that impede water flow or cause uneven distribution. Use a gentle brush or compressed air to remove dirt or particles that might obstruct the sprinkler’s function. This simple step can significantly improve the system’s efficiency.
Controller Calibration
Your controller, or timer, is the brain of the system. Ensure it’s programmed correctly to align with your garden’s water needs. Make adjustments according to changes in the weather, season, or plant requirements. Consider investing in a smart controller that adjusts watering schedules based on weather forecasts for optimal efficiency.
Winterization
Before the cold weather sets in, preparing your system for the winter is crucial. Drain any excess water from the pipes to prevent freezing and potential damage. Consider professional help for winterization, especially in regions with harsh winters, to safeguard the system and avoid costly repairs in the spring.
Professional Maintenance
Periodically engage professional services for thorough maintenance. A certified technician can conduct a comprehensive check, ensuring all components are in top condition. They can detect and resolve potential issues that might escape your notice, extending the life of your system and preventing larger problems down the line.
Conclusion
As you conclude your sprinkler installation journey, marvel at the transformation of your garden. The once labor-intensive task of watering plants becomes automated and efficient, allowing you to sit back and relish the beauty that unfolds before your eyes. The step-by-step guide we’ve navigated together paves the way for a thriving garden, reflecting the care and attention put into its design and installation.